NGA Employee CAC Resources
Step 1 - Setting up for Apple
To get started you will need:
1. Common access card (CAC)
2. Card reader
NGA recommends you use the latest Mac operating system (OS) version (currently Ventura). To start using your CAC, follow these basic steps:
1. Get a card reader. Note: Macs do not typically come with card readers; therefore an external card reader is needed. NGA recommends the SCR3310v2 card reader.
2. Acquire USBC to USB Adapter.
3. Plug in your card reader to the adapter. Note: You may receive a pop-up (shown below). If so, select Allow.

4. Download and install the latest Citrix Workspace application. To do this, navigate to the following site: https://www.citrix.com/downloads/workspace-app/mac/workspace-app-for-mac-latest.html and install the Citrix Workspace application.
5. Choose all the default settings for the installation process, if asked.


Installing and Importing the DoD Root Certificates
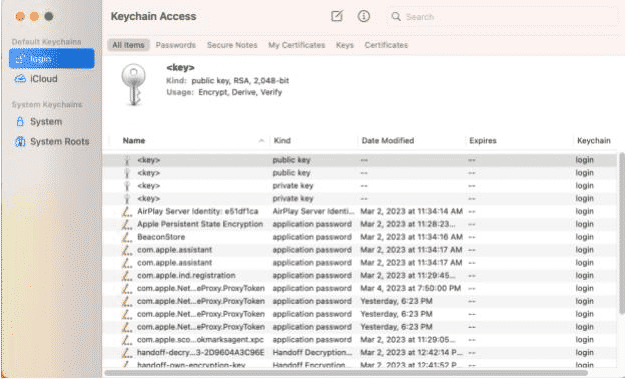
1. Navigate in Spotlight Search Keychain Access and select the application.

2. Select the Login keychain on the left side in the Keychain Access window.
3. Ensure you are on the All Items tab.

4. Download and PKCS 7 bundle for DoD from the Tools & Configuration Files - DOD Cyber Exchange . Note: You may need to go to the second page of tools listed or click Show 25.

Once you’ve downloaded the files, open the downloaded folder and double-click on the certificates separately to see that each one is added to the Keychain Access application. The certificates you need are below. If you have old certificates you may need to remove them.

Trusting the DoD Root Certificates
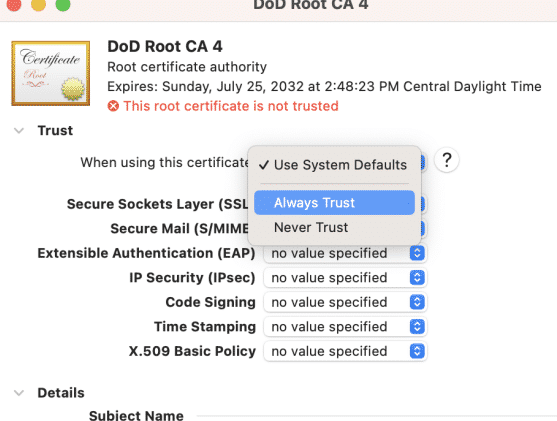
1. If your certificates are showing red X’s, you will need to trust the DoD Root Certificates.

2. Ensure you have the Login Keychain (upper left) selected in the Keychain Access app, and then select the Certificates tab under Category.
3. You should see a list of certificates that start with DoD. Note: All the certificates with red X’s must be manually trusted.

4. Double-click any certificate that has a red X. Expand the Trust menu and change “When using this certificate” to Always Trust.

5. Select the red X in the upper left to close. This will prompt you for your password. Repeat these steps for ALL the certs with red Xs.


